Microphone Sensitivity, Saturation, and Overload
Your ear can detect quiet sounds and loud sounds, covering 120dB in dynamic range.
Microphones, in general, can't do this. Microphones can be designed for quiet sources or for loud sources, but generally cannot do both equally well. (By the same token, cameras cannot capture both candle-lit interiors and mid-day outdoor scenes without configuration changes and/or performance compromise; cars optimized for high speed typically cannot also haul sheets of lumber or soccer teams; impact drivers are useless for fixing eyeglasses...)
Knowing how to use any given microphone within its most effective range is one of the skills that will make your recording sessions better.
The Most Basic Aspect of Gain-Staging
If you put a mic on a source, and your DAW software or audio interface lights up in red, that indicates that the input has "clipped" or overloaded. The easiest solution is to turn down the preamp gain.
What if it is already turned down all the way? We need for a deeper understanding of the interplay between a mic's sensitivity and a source's volume.
Two Kinds of Clipping
If you put a microphone on a loud source, the signal could distort in multiple ways. The two most common are:
- The mic could overload the preamp and/or the audio interface (ADC / Analog to Digital Converter).
- The microphone could overload internally.
Distinguishing these two related issues is critical to preventing them. For example, if the source is too loud for the microphone, turning down the preamp gain would not help -- because the signal would already have been distorted within the microphone.
This article is focused the second of those two types of clipping. This is a deep dive into gain-staging within the microphone, and how that determines headroom and saturation. If you are interested in managing overload situations outside the microphone, see our articles on gain staging and mic placement.
Microphone Headroom and Saturation
A mic's "headroom" indicates how capably it can capture high-SPL sources. Some microphones have very high headroom, which means they can capture the loudest sources in the studio (e.g. snare drums, trumpets) with clean transients and low distortion. The Roswell Mini K47, Mini K87, KD, RM8, Delphos II, and Cabmic all have high headroom, high SPL capability, and low distortion.
You might ask why all microphones don't do this. The answer is suggested by the adage that should govern every recording session: if it sounds good, it is good.
The most revered microphones in history were not capable of high SPL. They did not capture transients cleanly. They all employed tube circuits and transformers, which inflict glorious, harmonious damage to your audio signal. When we're wearing our marketing hats, we call this "saturation." When we're wearing our lab coats, we call this by its proper name: distortion.
Not all distortion is bad. If the word makes you think of a Marshall 4x12 cabinet turned up to 11, you would not be incorrect, but you should be aware that low levels of some kinds of distortion (specifically second-order harmonics) are responsible for much of what people think of as "tube mic sound." All the vintage tube mics on everyone's short list -- the C12, ElaM 251, U67, U47, etc., all created even-order harmonic distortion for moderate to loud sources. That's a significant part of why they sound "rich" and "vintage" and "warm."
Microphones designed to have "character" or "saturation," whether they use vacuum tubes or merely sound like they use vacuum tubes, have less headroom -- because headroom is essentially the opposite of saturation. Roswell mics with saturation and character include the Mini K47x, Mini K67x, Colares, and Aztec. (Scroll down for tips on adding headroom to these microphones.)
Headroom and saturation are at odds within a microphone, literally by definition: having high headroom means having low distortion. Having saturation, aka having moderate levels of second harmonic distortion, means running out of headroom in a musically pleasing way.
Said another way, the thing that makes a "character" mic sound like it has character is that the mic's circuit is gently overloading in a way that adds richness and depth to the signal. Be aware that there is an SPL point at which this gentle saturation becomes hard distortion. For tips on resolving that, scroll down.
Accommodating high-SPL sources with "character" mics
If a microphone is overloading internally, it will sound distorted, or broken, or might even cut out.
If you hear your track distorting or cutting out, first check the preamp, interface, and DAW software; if any of those indicate clipping, then the problem might be external to the microphone. See these articles on gain staging and mic placement.
If the microphone seems to be overloading internally, try these solutions:
- If the source is amplified, try turning it down. This is easy for a guitar amp. (Use a load box if you think the tone is changing by running it at lower volume.)
- If the source is acoustic, lower its volume (if possible): for example, have the drummer play with lighter sticks, or have the horn player move off-axis rather than blasting directly into the mic.
- Move the microphone farther from the source. The inverse square law says that that intensity of the sound drops with the square of the distance. The easier way to apply this to your studio is to remember that the SPL drops by 6dB for every doubling of distance. If your singer is four inches from the mic, try moving the mic back another four inches. If the guitar cab mic is up against the grille cloth, pull the mic back 2-3 inches.
- Turn on the mic's input attenuation (pad). The Delphos II, Colares, and Aztec have external switches for attenuation; all of these will add 10dB of headroom to the mic, and will prevent the mic from overloading its internal circuitry. Matched pairs of the Mini K47x and Mini K67x have attenuation pad switches located inside the mic; see details on this below.
Using the internal pad switch on Mini K series microphones
Matched pairs of the Mini K47x and Mini K67x have internal attenuation (pad) switches. Custom Shop editions of all Mini K models can optionally be ordered with internal pad switches. To access these switches:
- Remove the XLR3 cable from the microphone.
- Holding the mic in one hand, unscrew the end cap (the bottom inch of the mic body, below the seam) with the other. No tools are needed or recommended for this; unscrewing the end cap is no more difficult than unscrewing a light bulb.
- Slide the microphone's body cylinder off of the chassis.
- Locate the pad switch for your mic:
-
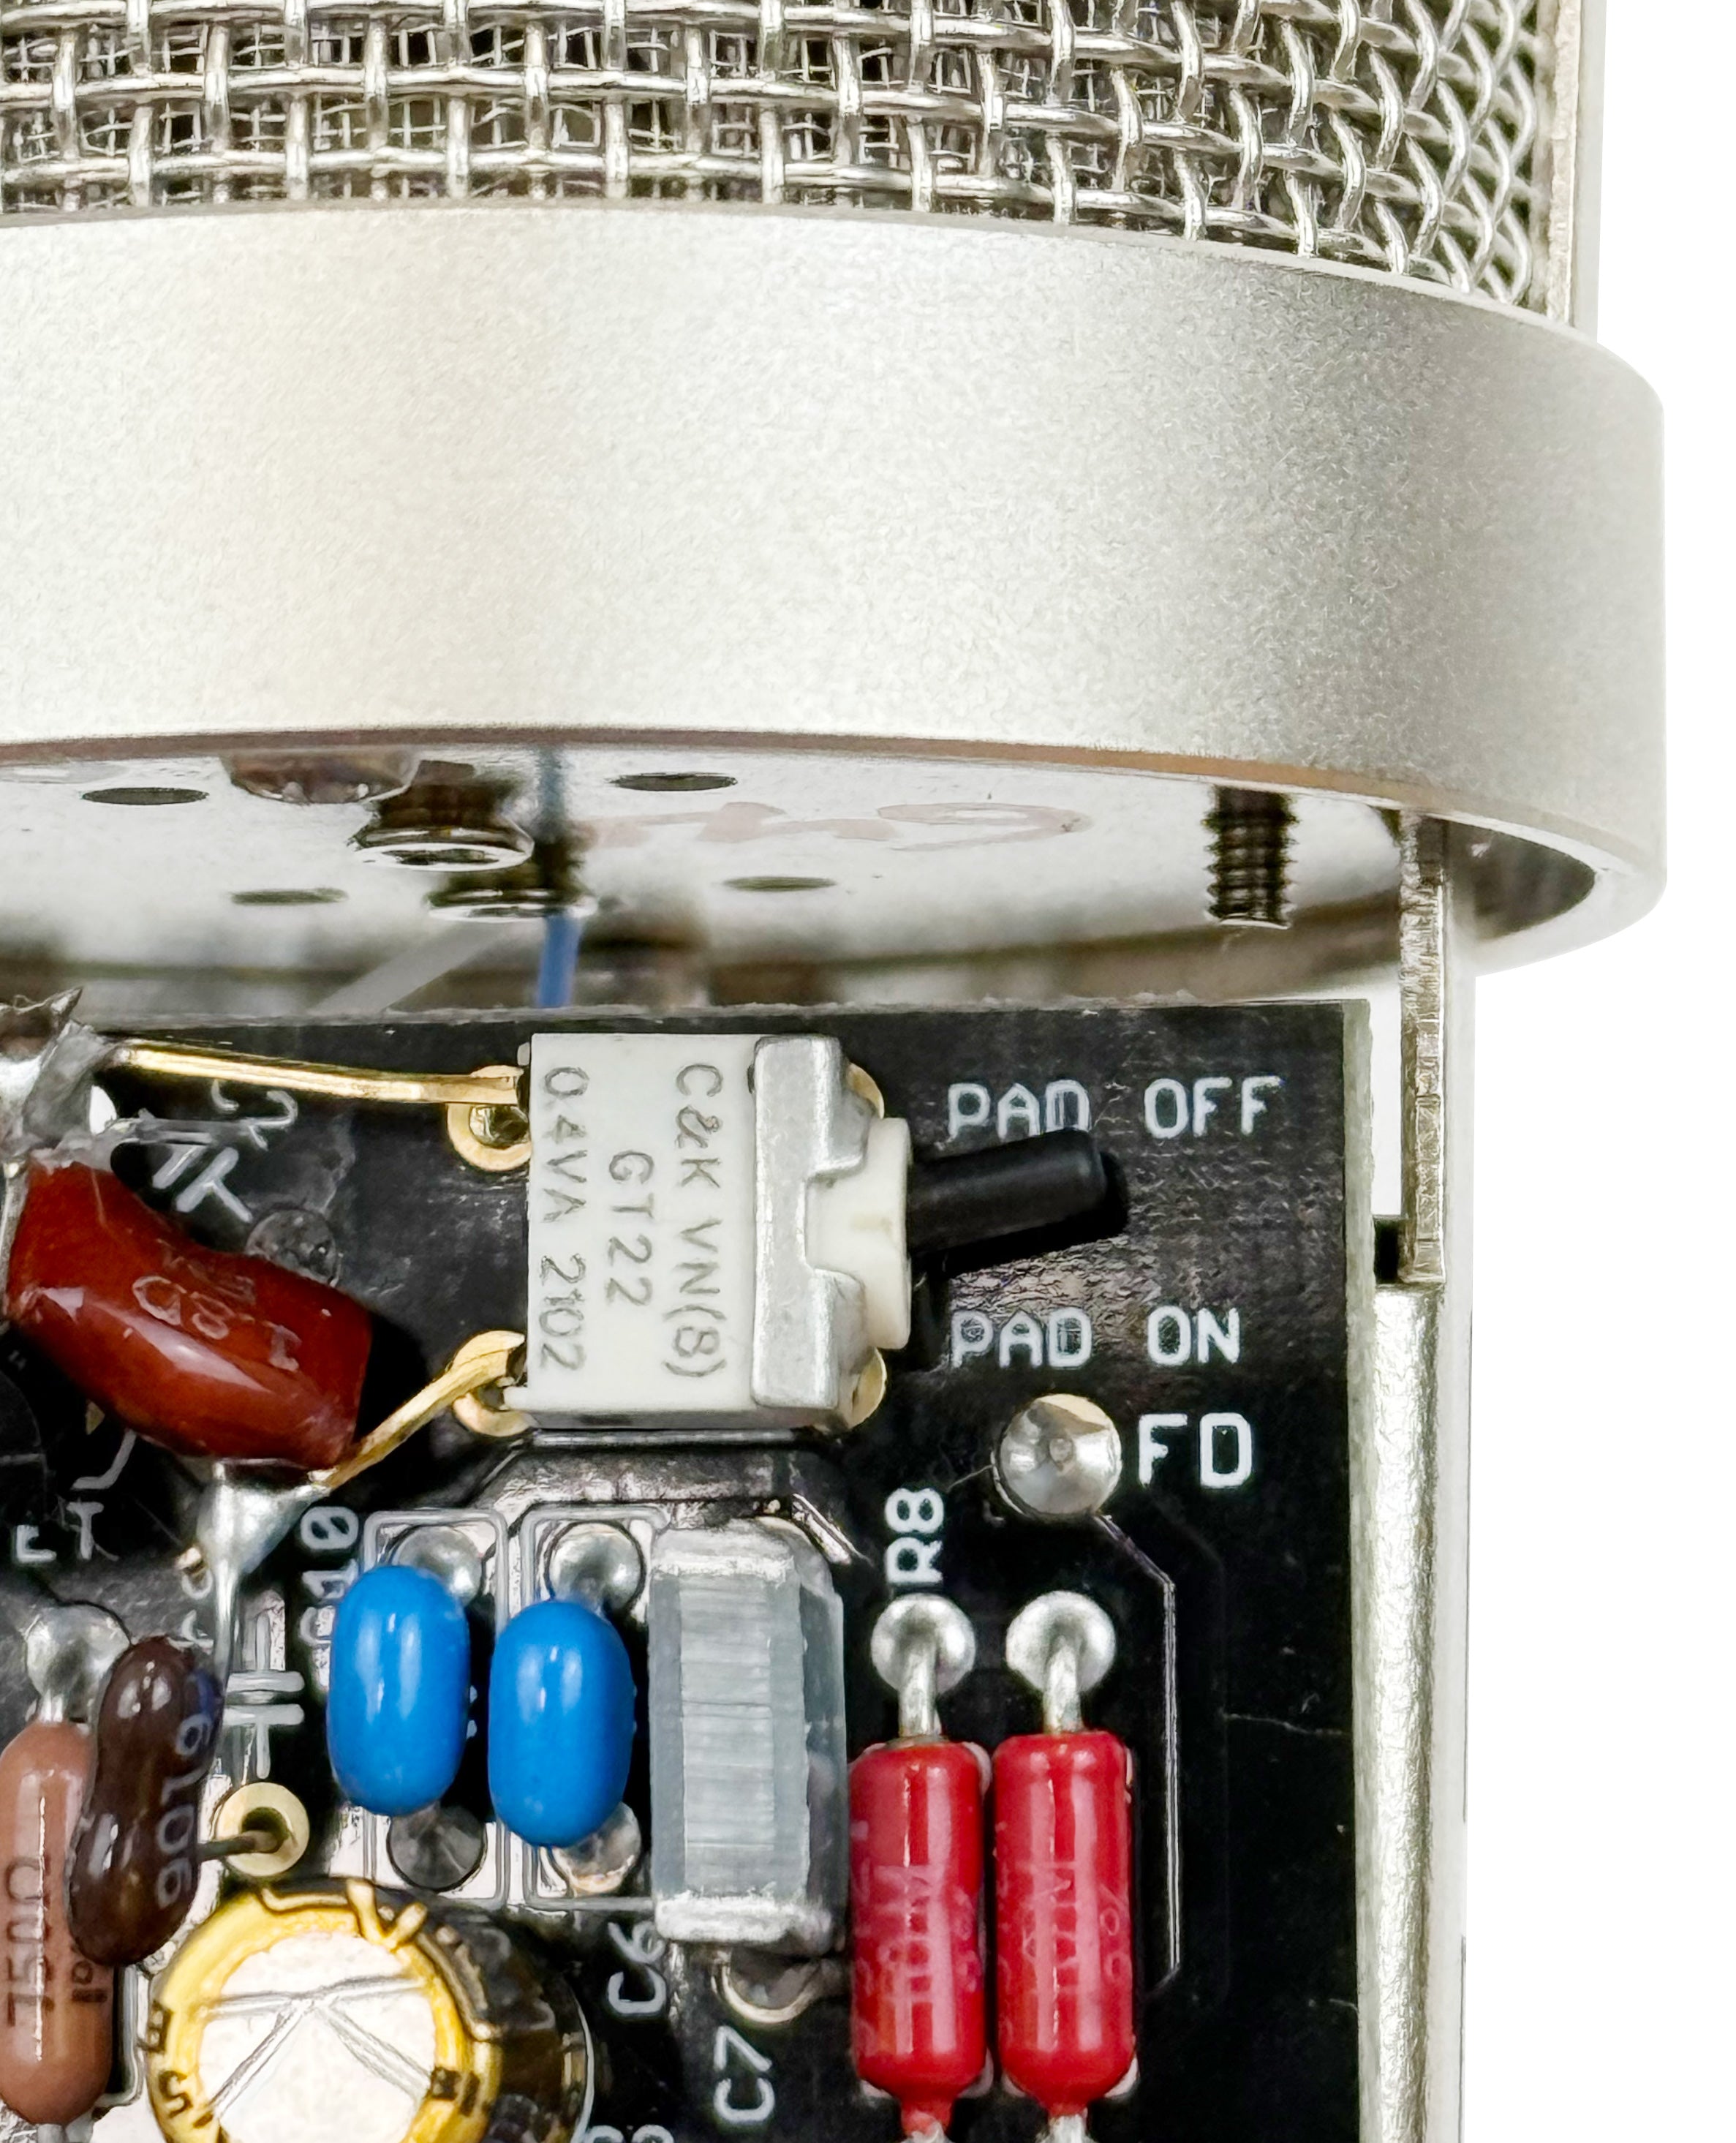 For the Mini K47x and Mini K67x, the pad switch is located at the top right corner of the circuit board. (See photo at right.)
 - For the Mini K47 and Mini K87, the pad switch is located at the top right corner of the rear circuit board.
-
- Carefully slide the body cylinder back onto the chassis, notched end first. Do not pinch or crush any internal wires with the body cylinder.
- Rotate the body cylinder until the alignment notch snaps onto the tab at the front of the mic body. If you miss this step, the mic's EMI shielding would be compromised.
- Screw the end cap onto the threads at the bottom of the mic. Do not use tools to tighten it. Turn the end cap until it is snug; if it is loose, the mic's EMI shielding would be compromised.
All content Copyright ©2025 Roswell Pro Audio, LLC
Return to article index:
Getting the most from your microphone